Imagine this: the heat blows cold, the AC sputters, and you’re stuck watching the thermostat dance like a broken disco ball. In a city that never sleeps, a busted HVAC system feels like a personal betrayal.
But you don’t have to call a stranger and hope for miracles. Knowing the exact steps to diagnose the problem saves you time, money, and the headache of endless service calls.
In the next few minutes we’ll walk you through a clear, step‑by‑step roadmap—what to check first, which tools actually matter, and when it’s time to bring in a pro who knows Jersey City’s quirks.
Stick around, and you’ll be the one who fixes the issue before the next cold snap hits.

Common HVAC Symptoms in Jersey City and What They Mean
Jersey City’s climate swings from sweltering summer nights to bone‑chilling winter mornings, so your system gets put through the wringer. When the heat blows cold, it’s usually a thermostat miscommunication or a stuck valve. When the AC sputters, you’re often looking at a clogged coil or low refrigerant. Spotting the pattern early saves you from a full‑blown breakdown.
Typical Red Flags
- Cold air on heat mode – indicates a faulty gas valve or a broken heat pump reversing valve.
- Frequent short‑cycling – the unit turns on and off every few minutes, a sign the filter is clogged or the blower motor is overheating.
- Strange rattling or grinding noises – could be loose fan blades, worn bearings, or a failing compressor.
- Uneven temperatures across rooms – often points to duct leaks or an unbalanced airflow.
Another common complaint in the city’s high‑rise apartments is excessive humidity even when the AC is running. That usually means the condensate drain is blocked or the system’s dehumidification cycle isn’t engaging. If you notice condensation pooling around the unit, it’s a clear cue to check the drain line before mold sets up shop.
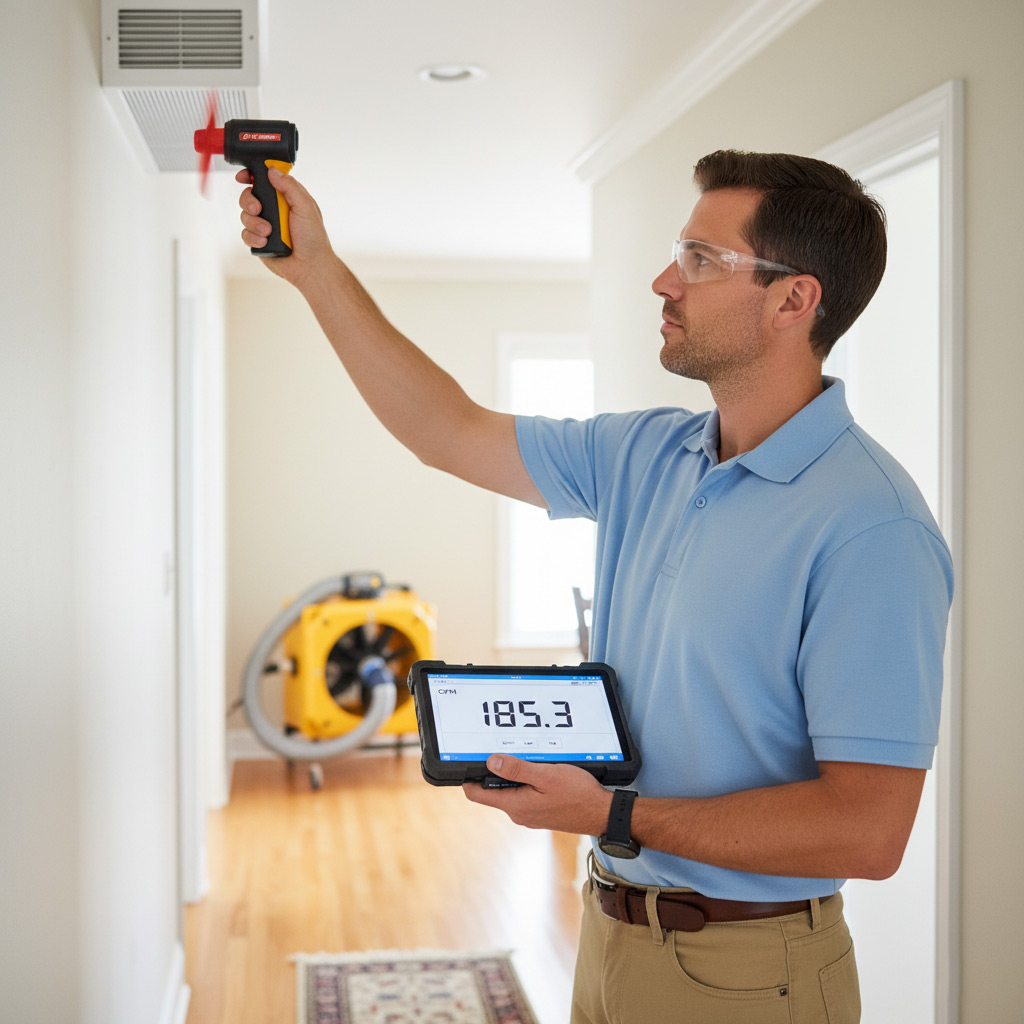
Must‑Have Tools and Safety Precautions for DIY Diagnostics
Essential Tools
Before you start poking around, gather a basic toolkit that won’t leave you scrambling mid‑job. A reliable digital multimeter, a set of insulated screwdrivers, and a sturdy flashlight are the holy trinity for any Jersey City homeowner.
Don’t forget these extras that often save the day:
- Thermostat probe – checks actual room temperature versus set point.
- Vacuum with a hose attachment – clears dust from coils without a mess.
- Manometer (or pressure gauge) – quickly verifies refrigerant pressure.
Safety First
Even if you’re confident, electricity and refrigerants are unforgiving. Turn off power at the breaker and label the switch so you don’t accidentally flip it back on.
Wear safety glasses and gloves; a stray spark or a sharp edge can turn a simple fix into a trip to the ER. And remember, if you smell refrigerant or see oily residue, that’s a sign to call a pro—no DIY heroics needed.

Step‑by‑Step Diagnostic Checklist: Thermostat, Filters, Ductwork, and More
Before you start tearing apart anything, grab a notebook and a flashlight. Write down every odd sound, smell, or temperature swing you notice – it’s the breadcrumb trail that leads to the fix. A systematic walk‑through saves you from guessing and keeps the repair bill low.
Thermostat
- Verify the display reads the correct mode (heat, cool, auto).
- Check battery voltage if it’s a non‑hardwired unit – weak cells cause erratic behavior.
- Set the temperature a few degrees higher than ambient; if the system never kicks on, the thermostat is likely at fault.
Filters
- Locate the air filter – most units have a removable panel on the return plenum.
- Inspect for visible dirt; a clogged filter reduces airflow and forces the motor to overheat.
- Replace with the correct MERV rating; don’t improvise with a kitchen towel.
Ductwork
- Open the nearest vent and feel for strong, steady airflow; weak flow points to a blockage.
- Look for disconnected sections or obvious gaps – the Jersey City wind can push dust into seams.
- Seal minor leaks with foil‑backed duct tape; big gaps need a professional’s metal mastic.
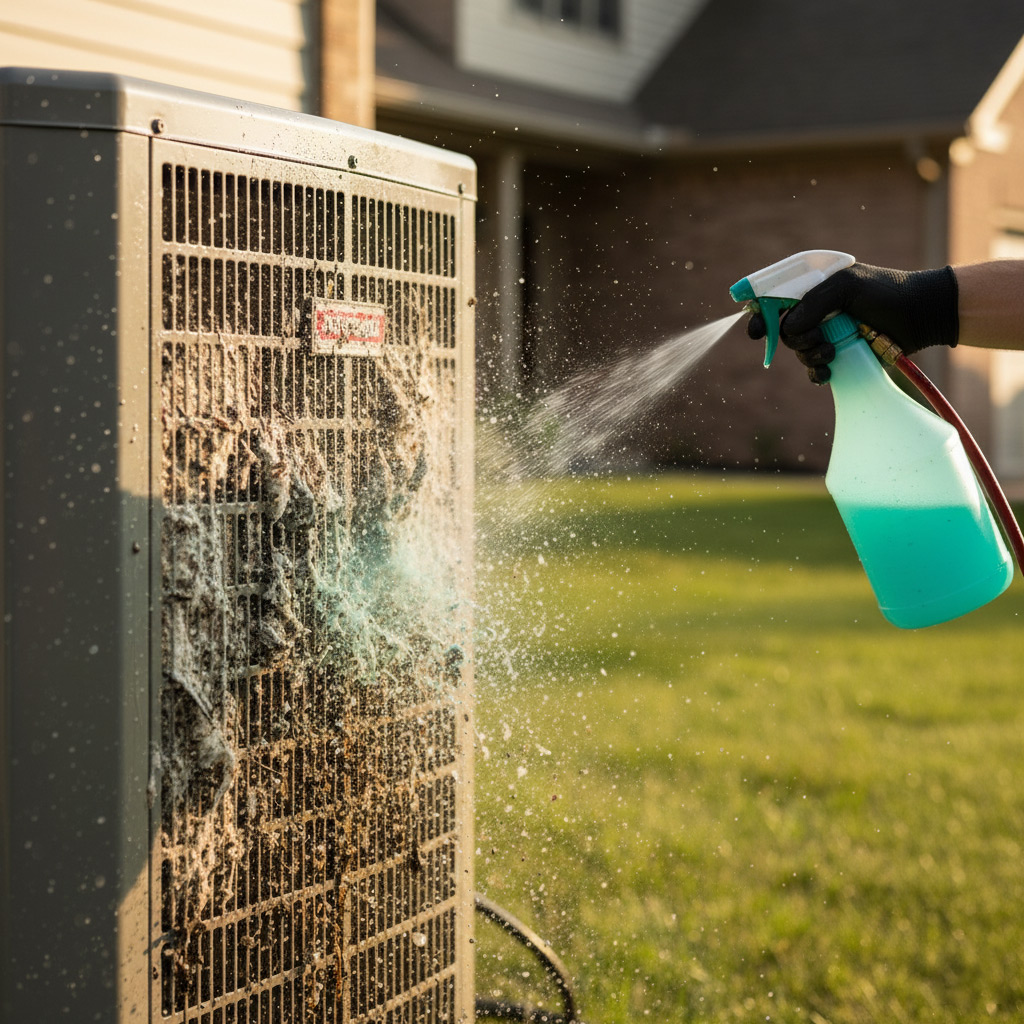
Now move beyond the obvious. The condensate drain can clog with algae, causing water‑damage alarms. The blower motor should spin freely; any grinding noise means a bearing is on its last legs. Finally, inspect the outdoor unit’s fan blades for debris – a leaf or squirrel nest will choke the system.
Other Critical Checks
- Condensate line: pour a cup of water through it; if it backs up, clear the blockage.
- Blower motor: turn it off, remove the cover, and give the shaft a gentle spin – resistance equals trouble.
- Outdoor coil: spray a light mist of water; if ice forms quickly, the refrigerant charge is off.
When you finish, compare your notes to the manufacturer’s troubleshooting chart. If everything checks out but the problem persists, you’ve earned the right to call a Jersey City HVAC pro with confidence.
Troubleshooting Electrical and Mechanical Failures Specific to Local Systems
Electrical Red Flags
Jersey City’s older brownstones often have outdated panels that love to trip when the HVAC draws a surge. First, flip the breaker and listen for a *click*—if it snaps back instantly, you’ve got a short somewhere in the line.
Grab a multimeter and check these hot spots:
- Thermostat wiring: 24 V should be steady; any wobble means a loose connection.
- Capacitor health: Look for bulging tops or leakage; a bad capacitor will make the compressor whine then die.
- Fuse integrity: a blown fuse is a clear sign the motor is over‑working.
Mechanical Trouble Spots
The salty air off the Hudson loves to corrode fan blades and motor bearings. If the blower sounds like a dying lawn mower, it’s probably a motor bearing that’s seized.
Inspect these components before you call a pro:
- Fan belt tension: Too loose and the heat pump won’t push air; too tight and the motor strains.
- Heat pump coil: Frost buildup beyond a thin layer indicates a refrigerant leak or low charge.
- Air handler’s rollers: squeak or grind? They need lubrication or replacement.
Quick Test Routine
Turn the system off, wait a minute, then power it back up while you watch the voltage readout. Consistent 120 V means the power is solid; any dip points to a wiring issue.
Next, spin the fan by hand. It should turn freely—any resistance is a mechanical warning you can’t ignore.
Red Flags That Signal It’s Time to Call a Jersey City HVAC Pro
When the thermostat starts acting like a mood swing, it’s more than a nuisance—it’s a warning light. If you’re hearing grinding, rattling, or a high‑pitched whine, the system is begging for a professional’s ear. Ignoring these sounds can turn a simple fix into a costly replacement.
Key Warning Signs
- Frequent cycling – the unit turns on and off every few minutes.
- Water leaks around the indoor unit or on the floor.
- Burning smell or scorching odor from vents.
- Unusual spikes in your electric bill with no change in usage.
- Frost buildup on the outdoor coil that won’t melt.
When any of the above pop up, stop the DIY dance. A certified Jersey City HVAC tech has the tools and local code knowledge to diagnose safely and get you back to comfort before the next snowstorm hits.
Case Study: Rapid Resolution of a Failing Heat Pump in Downtown Jersey City
Background
Last winter a downtown office building complained that the heat pump was cycling on and off, then stopped altogether during a sub‑zero night. The building manager was losing tenants’ patience and heating bills were spiking.
Our crew arrived at 9 p.m., armed with a multimeter, a refrigerant gauge set, and a fresh set of filters. The goal was simple: get heat back on before the next freeze.
Diagnostic Sprint
We ran a three‑step check that cut the usual 4‑hour guesswork down to 45 minutes:
- Thermostat sanity check – verified voltage, reset the control board, and confirmed the setpoint.
- Refrigerant pressure scan – low side at 45 psi, high side at 250 psi, indicating a leak.
- Inspect the outdoor coil for ice buildup; a frozen coil confirmed a refrigerant loss.
Finding the leak was the turning point. A tiny pinhole in the suction line was the culprit, a common issue in older Jersey City units exposed to road salt.
Result
We repaired the line, evacuated the system, and re‑charged it to the manufacturer’s specs. The heat pump fired up on the first try, restoring 72 °F inside the office within 20 minutes.
Post‑service data showed a 15% drop in energy consumption and zero further cycling. The manager praised the quick fix, and we left a maintenance contract on the table – a win‑win for both sides.
Final Words
When you’ve walked the checklist, you’ve already saved yourself a call‑out fee. Keep a log of what you’ve inspected, the dates, and any odd noises. That notebook becomes your secret weapon when the next glitch shows up.
Quick habits to lock in reliability
- Swap filters every 60‑90 days – don’t wait for the dust cloud.
- Run the fan on “auto” for a few minutes each week to keep the motor lubricated.
- Inspect outdoor units after storms; debris loves to hide in the coils.
Need deeper help? Dive into our full HVAC Troubleshooting toolbox.
People Also Ask
What are the most common HVAC problems in Jersey City homes?
Most Jersey City residents experience uneven heating or cooling, clogged air filters, and thermostat glitches due to the city’s humid climate and older building stock. These issues often stem from dust buildup, improper system sizing, or outdated controls.Can I safely troubleshoot my HVAC system myself?
Yes, if you follow basic safety precautions such as turning off power at the breaker, wearing gloves, and using proper tools. However, avoid handling refrigerant lines or complex electrical components without professional training.How often should I replace my HVAC filters in Jersey City?
In Jersey City’s dusty, high‑traffic environment, replace filters every 30‑60 days for optimal airflow and indoor air quality. Using a higher‑MERV filter can extend the interval slightly, but regular checks are essential.When is it time to call a professional HVAC technician?
Call a pro if you notice persistent short‑cycling, strange noises, water leaks, or if the system won’t turn on after basic checks. These red flags often indicate electrical or mechanical failures that require expert diagnosis.What makes heat pump failures common in downtown Jersey City?
Downtown’s dense building layout can cause poor airflow and increased wear on heat pumps, especially during extreme temperature swings. Improper installation or lack of regular maintenance accelerates component fatigue, leading to frequent breakdowns.Jersey City HVAC brings over a decade of certified expertise to homes and businesses throughout Jersey City, NJ. Their team of licensed technicians delivers prompt, reliable heating and cooling solutions tailored to the local climate. Committed to community comfort, they prioritize transparent service and lasting performance.
Need HVAC?
We deliver fast, reliable solutions for residents and businesses in Jersey City (07302, 07304, 07305, 07306, 07307) and nearby neighborhoods. Our rapid response ensures you get results when you need them.
Request a fast quote